Installation
WHERE TO MOUNT
Valentine One works best when mounted high in the windshield, and toward the center between the windshield pillars. Use your choice of windshield or visor mounts.
- When properly mounted, the front antenna will look forward through the glass. It must have an unobstructed view. Don’t put it behind the parked windshield wipers, or directly behind an in-glass antenna. Don’t position it so that it “looks” into the rearview mirror.
- The rear antenna will look rearward, between passengers and out the rear glass. It, too, must have an unobstructed view.
- Detector performance is enhanced by a high mounting position. Two reasons. For radar, a longer sight line to the horizon always helps. For laser, moving away from the hood and its sun reflections helps a lot.
IMPORTANT NOTE: Windshield heaters such as Ford’s InstaClear® block radar from passing through the glass (look for a brown tint). So do solar barrier windshields of the type used on GM Venture-Montana-Silhouette-Trans Sport minivans and on some imported luxury sedans (look for a reddish or copper tint). Same for mirrored sun screens. Detector performance will be greatly reduced when V1 is mounted behind such metallic films.
SAFETY WARNING: Because a detector on a windshield mount or visor mount is not permanently attached to the car, it could come loose in a crash, possibly causing injury. Also, a passenger may move forward on impact and contact the detector. Keep these possibilities in mind when you mount your Valentine One.
HOW TO MOUNT
MOUNTING ON VISOR
- Slide visor mount on to Valentine One.
- Clip to visor near center of windshield.
- Adjust visor angle so unit is approximately level.
- Connect power cord and plug into lighter socket.
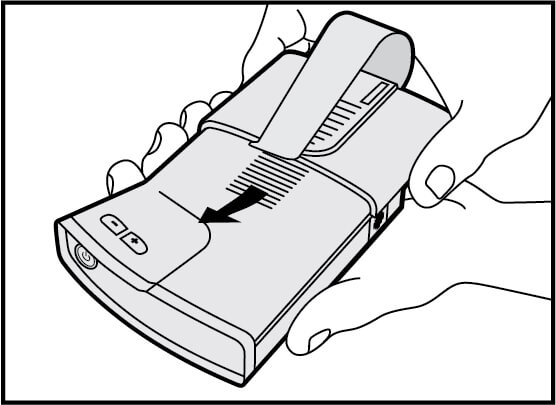 Visor mount slides on from front.
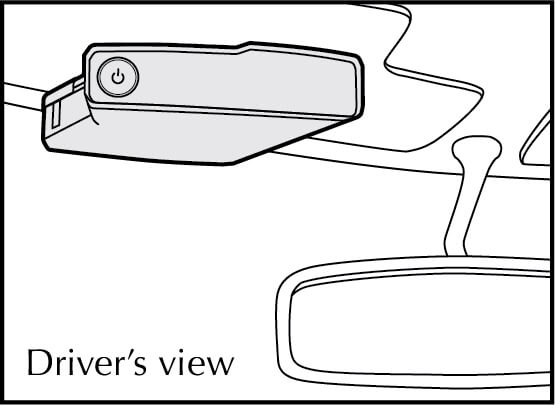 Visor mount slides on from front.
MOUNTING ON WINDSHIELD
- Slide windshield mount onto Valentine One.
- Press suction cups to glass near center of windshield.
Hint:
A. If suction cups don’t stick, try rubbing your thumb a few times around the face of the cup with a circular motion.
B. If suction cups are distorted or misshapen, hold under hot tap water for 15-30 seconds. - To adjust angle, press Thumb Tab and simultaneously slide unit within mount until level position is achieved.
- Connect power cord and plug into lighter socket.
- To release from windshield, gently press down the wire Release Bar connected to both suction cups.
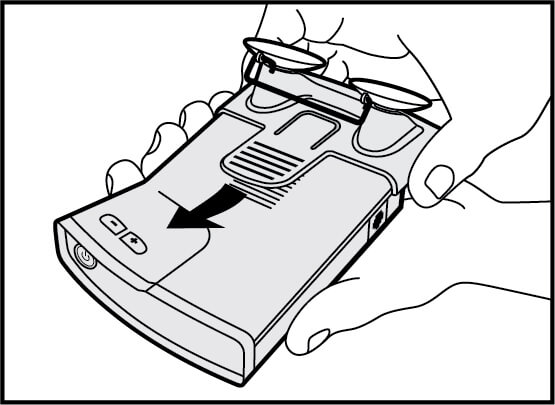 Windshield mount goes on from front.
 Install near center of windshield.
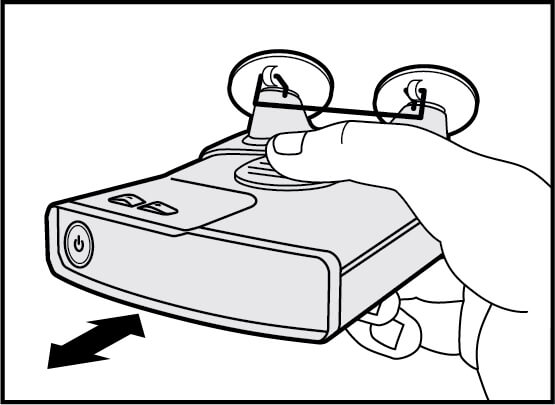 Unit slides in mount to adjust angle.
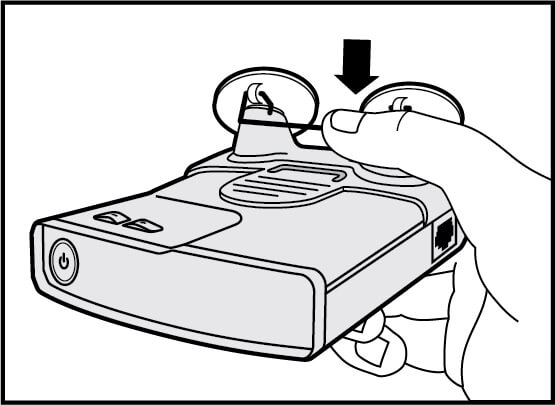 Press bar to loosen suction cups.
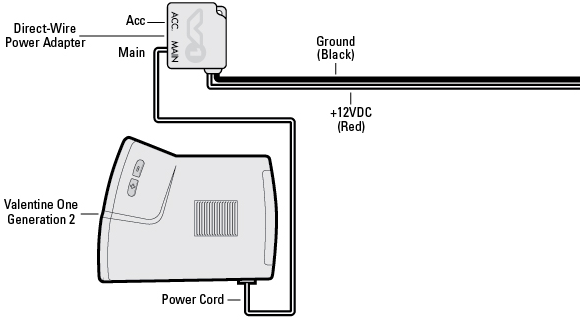
For complete information on wiring V1 Gen2™ directly into your car’s electrical system, see pages 8, 11 and 12 in the V1 Gen2 Owner’s Manual.
Download our new V1 Gen2 Quick Start Guide.